What Must Be Defined Before Developing a Quilted Bag?
Before developing a quilted bag, define the bag format and panel map, the quilt pattern and its origin, the intended layer stack, the stitch path, the points that must align at seams and edges, and the actual load used for sample review. A selling name or reference photo does not prove the padding material, thickness, stitch spacing, internal construction or performance. Record unknown items as Open and confirm them on the current sample.
“Quilted” can describe a visible direction without telling a developer how a particular panel is built. One project may call for a raised surface, another for a flatter stitched appearance; the name alone does not settle whether a padding or spacer layer is present. Start with the buyer's format, the visible panels, the opening or flap, the objects the bag must carry, and the design features the reference is meant to preserve. Mark each decision Confirmed, Proposed, Open or Not applicable rather than turning an image into an unverified specification.
The practical output is a versioned pattern-and-panel map that another reviewer can read alongside a layer record and a current sample. It should answer where a visible unit begins, where it ends, what crosses a seam, and what happens when the bag is filled and carried. It is not a universal formula for quilting or a claim about a Celynora production method.
How Should the Quilt Pattern and Panel Map Be Defined?
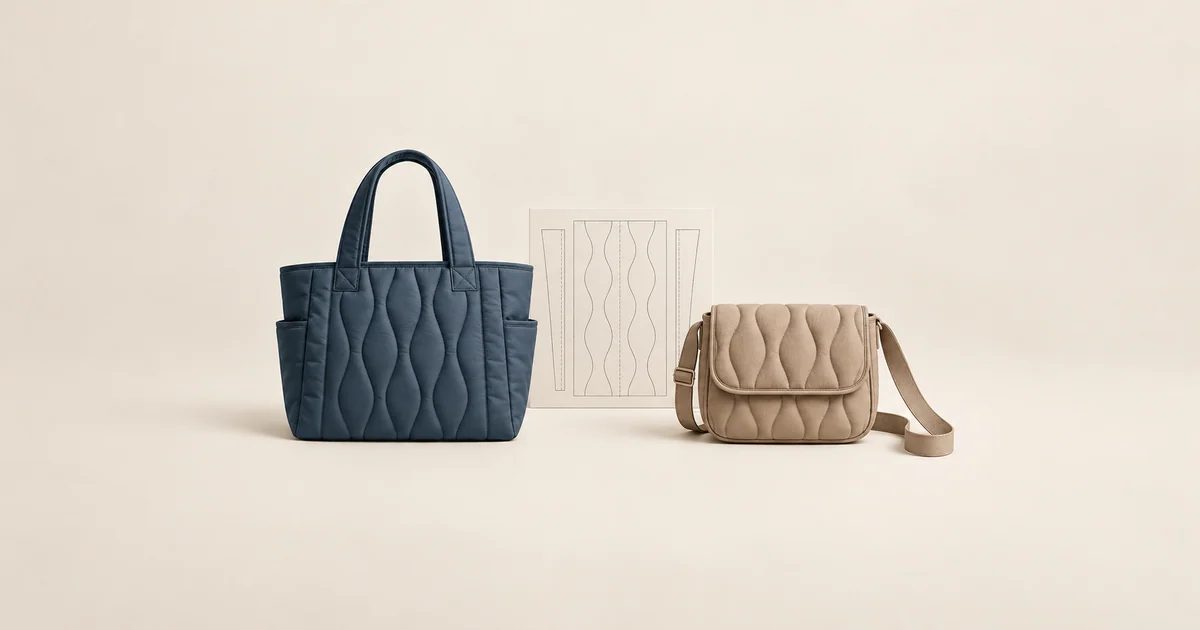
First name every panel that is actually in scope: front, back, flap, gusset, base and pocket only where the chosen bag has them. On each visible panel, draw an origin and centerline, then indicate the intended repeat direction and the edge where the final complete or partial unit will end. A diamond, channel or geometric grid is a useful visual description; a buyer-owned motif may be more specific. None of those names supplies the repeat dimensions or permission to copy another brand's recognizable design.
The origin is more useful than a vague instruction to “make the quilting even.” For a front panel, it may be the visual center or a feature the buyer wants centered; on a flap, it may be the closed-flap center rather than the flat cutting-piece center. If a logo, pocket, closure or handle base will interrupt the field, mark that zone before placing the repeat. The resulting map lets the team see whether the intended motif is centered when the bag is assembled and whether a unit will terminate awkwardly at a bound edge. The target is the buyer-approved composition, not automatic continuity across every panel.
| Record field | What must be stated | Status |
|---|---|---|
| Bag format and panel map | Tote, shoulder, crossbody or other; front/back/flap/gusset/base/pocket panels in scope | Confirmed / Open |
| Pattern description | Diamond, channel, geometric grid or buyer-owned motif; direction and visual priority | Confirmed / Proposed / Open |
| Pattern origin and repeat | Origin/centerline, repeat width/height or marked artwork where relevant | Confirmed / Open |
| Layer stack | Shell, padding/spacer if any, backing or lining, and whether layers are quilted together or separately | Confirmed / Proposed / Open |
| Padding/spacer | Material and thickness only when specified; otherwise no padding or Open | Confirmed / N/A / Open |
| Stitch path | Continuous or panel-specific route, intersections, starts/stops and intentionally unquilted areas | Confirmed / Proposed / Open |
| Thread appearance | Color/contrast, visible finish and supplied specification if available | Confirmed / Open |
| Interaction zones | Logo, hardware, pocket, closure, handle/strap attachment and seam areas | Marked / Open |
This record distinguishes a visual proposal from a measured specification. If the project supplies artwork or a tech pack, the origin and repeat can be tied to that version. If there is only a photo, mark the preferred appearance as Proposed and leave missing construction values Open. When a measured point or tolerance needs a repeatable method, record repeatable handbag measurement points in the general specification; keep the quilt origin, repeat and edge ending on this article's panel map.
Does every quilted panel need the same pattern scale?
No name requires that. Decide scale against each panel's dimensions, curve, seam and visual priority, plus the flap, pocket, logo and hardware zones. Panels may share a repeat or use an intentionally repositioned one; the approved map and current sample show which choice belongs to this project.
What Layer Stack and Padding Information Must Be Recorded?
Separate four questions that a product photo compresses into one appearance: the shell, any padding or spacer, the backing or lining, and the visible thread. For each, record the chosen material and known specification, whether it is included in the stitched assembly, and what remains Open. A backing and a finished lining may be the same layer in one project and separate in another; do not silently assume the arrangement. If the visual brief calls for no padding, mark that as a deliberate N/A decision only after the project confirms it.
A desired surface can be described as relatively flat, softly raised or more dimensional, but that is an appearance target to evaluate on a sample—not evidence of protective cushioning, strength, warmth or service life. The shell's drape, any spacer, backing, stitch route, panel curve and seam construction can all affect what the sample looks and feels like. Because those choices interact, the buyer should compare the assembled panel and bag against the marked reference rather than infer a universal layer thickness from the word “quilted.”
Define the stitch path as well as the layer list. Show whether the line is intended to continue across a panel, stop at a feature, cross another line or restart after an unquilted area. Note visible thread color and contrast if known, but keep thread specification, stitch spacing and starts/stops Open until supplied or approved for this project. The path on a drawing is a review target; it does not by itself confirm the route achievable on an assembled curve.
Does a quilted bag always contain padding?
No. A quilted appearance or selling name does not reveal the internal stack. List the shell, padding or spacer if any, backing or lining and thread separately. Until the current BOM, tech pack or identified sample confirms the construction, mark padding Open rather than guessing from a photograph.
How Should Stitch Paths, Seams, Edges and Hardware Be Aligned?
A pattern may look continuous on a flat front panel yet change visibly when a flap closes, a side seam joins or a bound edge consumes part of the last unit. Map those transitions before asking whether they “match.” For each visible join, record one of three intentions: a required match at a named reference point, an intentional pattern restart, or an Open decision for the sample. That is more actionable than demanding perfect continuation without specifying which assembled view controls.
Start with the front and back centers, then close the flap in the drawing and mark any line that must meet the body. At the side or gusset, identify whether the pattern crosses the join or begins again. At the base, say whether the base is quilted at all; a curved or reinforced transition can change the visible direction. At a bound or turned edge, show where the last visible unit should finish after assembly, not only on the flat panel. Place pockets, zippers, logo, closure, chain or strap seats and handle attachments onto the same map so a stitch path does not unintentionally disappear under a feature.
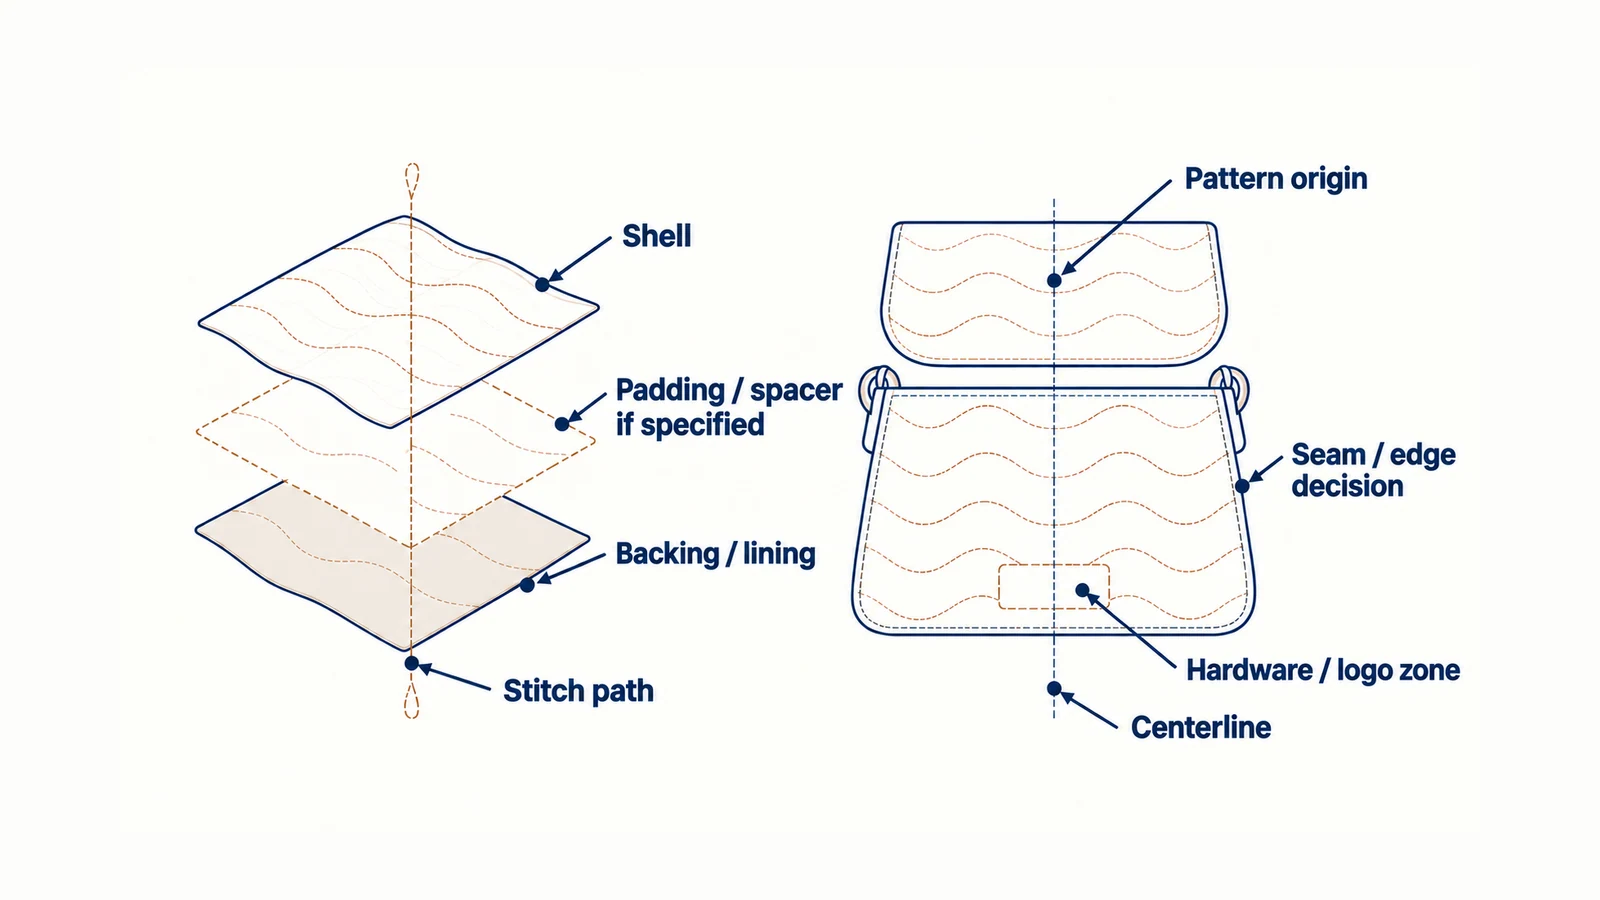
Concept illustration only: the layer and alignment map does not document an existing Celynora product, confirmed materials, stitch specifications or test results.
| Location | What must be mapped | Acceptance state |
|---|---|---|
| Front/back center | Pattern centerline, motif orientation and visual balance | Match / Review / Open |
| Flap to body | Whether pattern aligns when closed and which reference controls | Match / Intentional reset / Open |
| Side seam/gusset | Match point or approved pattern restart | Match / Intentional reset / Open |
| Base transition | Direction/change and whether base is quilted | Match / Intentional reset / N/A / Open |
| Bound or turned edge | How the final visible unit ends before binding/turning | Approved finish / Review / Open |
| Pocket/zip/closure | Whether pattern continues, stops or centers around the feature | Marked / Review / Open |
| Logo/hardware zone | Protected visual area, center relationship and path clearance | Marked / Review / Open |
| Handle/strap attachment | Pattern intersection and marked reinforcement/attachment area | Marked / Review / Open |
Review the map in the same state in which the buyer will see the bag: flap closed, contents in place where relevant, and strap or handle set as intended. An alignment that appears correct on a flat piece may read differently on a curved or loaded body. The reviewer should record the actual assembled result and the reference version used, not substitute a verbal “aligned” for a marked point.
Should a quilt pattern continue perfectly across every seam?
Not automatically. Mark the centers, flap line, seam or edge that truly needs to match, and identify joins where a planned restart is acceptable. Curved pieces and separately assembled panels may require a different visual decision; confirm the chosen one on the current pattern map and sample.
How Do Tote, Shoulder and Crossbody Formats Change the Quilting Brief?
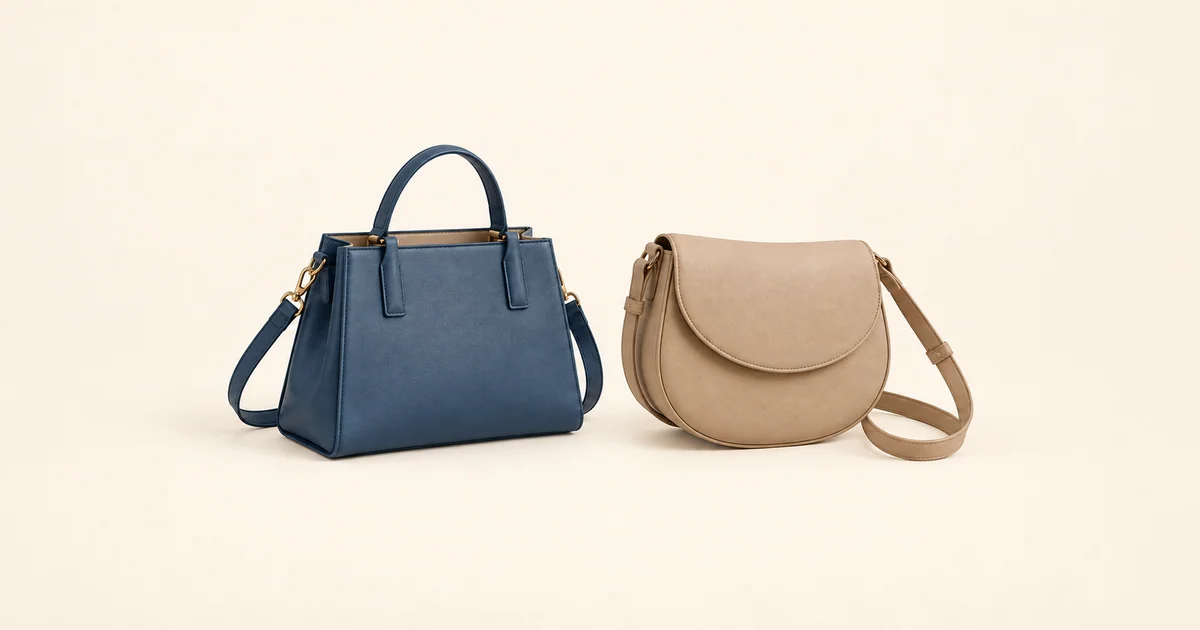
A quilted tote bag puts a larger visible field, opening and handle attachments into the same composition. Set the front-panel origin and edge finish against the actual tote proportions, then check whether the repeat is interrupted where the handles attach or the body turns into a side or base. A broad panel does not automatically call for a large motif. The relevant question is whether the proposed scale remains visually intentional after assembly and under the stated load. Buyers can review tote bag design references for format direction; the collection does not certify any particular quilting construction.
On a quilted shoulder direction, the front view, flap or closure and shoulder-strap or chain attachment may compete for the same visual center. Map where a visible line passes a hardware seat, which view should control centering, and whether carrying the bag rotates the patterned face. Review shoulder bag design references as carry examples, not proof that a chain, leather shell or quilted surface has a fixed performance.
A quilted crossbody bag may have a smaller or more curved visible panel, a flap, and strap roots close to the pattern field. The repeat may need to be repositioned or intentionally end at an edge so the key feature remains legible; that is a project composition choice, not a general rule that smaller panels need smaller quilting. Check the access path with the crossbody strap set as intended and the actual contents inside. Buyers can compare crossbody design references to discuss the intended carry direction, then confirm the panel and strap construction for the specific project.
Across the three formats, keep the same decision framework—origin, repeat, layers, path, interaction zones and loaded view—while changing the panel map and acceptance points to the actual bag. A format name selects which surfaces and carry states to review; it does not provide the missing layer or stitch specification.
What Should Buyers Check on a Quilted Bag Sample?
Review an identified sample against the approved or proposed map, not against a memory of the reference image. Record sample ID, map and panel version, layer status, known thread color or specification, the items used for a loaded check, and the review date. Photograph or mark the exact view used for a center or seam decision. If a later sample changes the shell, spacer, flap, hardware position or pattern origin, repeat the affected observations rather than carrying forward a prior “pass.”
Look at the unfilled and stated-loaded bag. Check pattern scale and direction, the center and edge endings, required match points or intentional restarts, visible line intersections and starts/stops, and any local puckering, uneven relief or shifted layer appearance. Then check whether a pocket, closure, logo or attachment unexpectedly cuts through a line or hides the intended center. Under the stated load, note whether the body shape changes the visual balance, opening or priority-item access. These observations support a project discussion; they do not establish batch consistency, stitch-spacing tolerance, tensile strength, abrasion life, protection or production approval.
| Checkpoint | What to observe | Record |
|---|---|---|
| Pattern scale and direction | Repeat size/shape against approved map and panel orientation | Observed / Not checked / Open |
| Origin and edge finish | Center/origin and how units end at required edges | Observed / Not checked / Open |
| Seams and joins | Required match points or approved intentional restarts | Observed / Not checked / Open |
| Stitch appearance | Visible path, intersections, starts/stops, skipped/loose-looking areas or unintended deviation | Observed / Not checked / Open |
| Surface and layers | Local puckering, uneven rise/flatness, layer shift or visible difference from approved direction | Observed / Not checked / Open |
| Hardware/pocket/logo | Alignment, clearance and unintended interruption | Observed / Not checked / Open |
| Loaded shape and access | Pattern/body appearance, opening and priority-item access under stated load | Observed / Not checked / Open |
| Version evidence | Sample ID, map version, layer status, load list and review date | Recorded / Open |
For the broader sequence of sample requests, approvals and revisions, prepare and review a handbag sample. This quilt-specific record remains tied to the design version and current observations; it is not an AQL inspection or a claim that the final order will match an unchecked sample state.
What Should a Buyer Send for a Quilted Bag Project Review?
A buyer can begin with the bag format, one reference or sketch, and the panels intended to be quilted. Add what matters most visually: pattern direction, origin or centerline, repeat, edge ending, and any seam that must match or may restart. If the artwork is a buyer-owned motif, the provider should confirm its rights or authorization; do not ask a team to reproduce another brand's recognizable pattern. Mark unknown values Open instead of presenting a photo as a finished technical file.
If known, add the shell, padding or spacer decision, backing or lining, visible thread direction, hardware and pocket zones, actual carry items and sample questions. A logo, closure, handle or strap location can be shown on a rough annotated image; a polished tech pack is helpful but not a prerequisite to contact. Estimated quantity, delivery country and target timing can frame the discussion when available. For an undecided development route, compare OEM and ODM starting points without assuming a quilt-specific capability, material, price or schedule has already been confirmed.
Planning a quilted tote, shoulder or crossbody bag project? Send the bag format, a reference image or your own pattern direction, the panels to quilt, known layer or alignment details, actual carry items, material and branding notes, estimated quantity and delivery country if known. You can start with open questions; available options, samples, specifications, pricing, MOQ and timing are confirmed for the specific project. Discuss Your Quilted Bag Development Brief.
B2B Buyer Checklist
Before you request a quote, prepare the information that affects MOQ, sample cost, lead time and final unit price.
- Target product category, size and reference images.
- Expected order quantity per style and per color.
- Material preference, lining requirements and hardware finish.
- Logo method, packaging items and delivery country.
- Target retail price or target factory price range.
Decision Table
| Buyer Question | Why It Matters | What to Send the Factory |
|---|---|---|
| What is my MOQ target? | MOQ affects material sourcing, production planning and unit price. | Quantity per style, per color and launch schedule. |
| Which material should I choose? | Material controls price band, durability and brand positioning. | Reference photos, desired texture and target market. |
| How much customization do I need? | Logo, lining, hardware and packaging change sample time and cost. | Logo files, packaging references and required details. |
| What is my delivery deadline? | Sampling, production and shipping need realistic planning. | Launch date, delivery country and preferred shipping method. |